 how-to
Preventing Saltwater Corrosion in Foundations: A 2026 Guide
Table of Contents
- How Saltwater Corrosion Attacks Coastal Foundations
- Saltwater Corrosion Protection for Concrete: Coatings, Sealants, and Membranes
- Foundation Waterproofing for Coastal Homes: Below-Grade and Above-Grade Systems
- Drainage, Water Table, and Hydrostatic Pressure Control
- Coastal Foundation Inspection Checklist: Warning Signs You Can Measure
- Repair vs. Prevention: Making the Call Before Damage Spreads
- Your Step-by-Step Plan for Preventing Saltwater Corrosion in Foundations
- Conclusion
- Frequently Asked Questions
Last Updated: October 5, 2026
How Saltwater Corrosion Attacks Coastal Foundations
Saltwater corrosion is the breakdown of concrete and reinforcing steel caused by chloride ions in seawater and salt air. This guide from Take Off Construction Management covers the mechanisms, warning signs, and a step-by-step plan.
Salt air carries chloride ions onto your foundation, moisture pulls them into the concrete, and once chlorides reach the reinforcing steel, or rebar, the steel rusts.
American Concrete Institute guidance on chloride-induced corrosion
Chloride Ions and Rebar Corrosion in Reinforcing Steel
Rebar corrosion is the leading structural threat to coastal foundations. Concrete normally protects steel through a passive layer formed by its high alkalinity; chlorides destroy it.
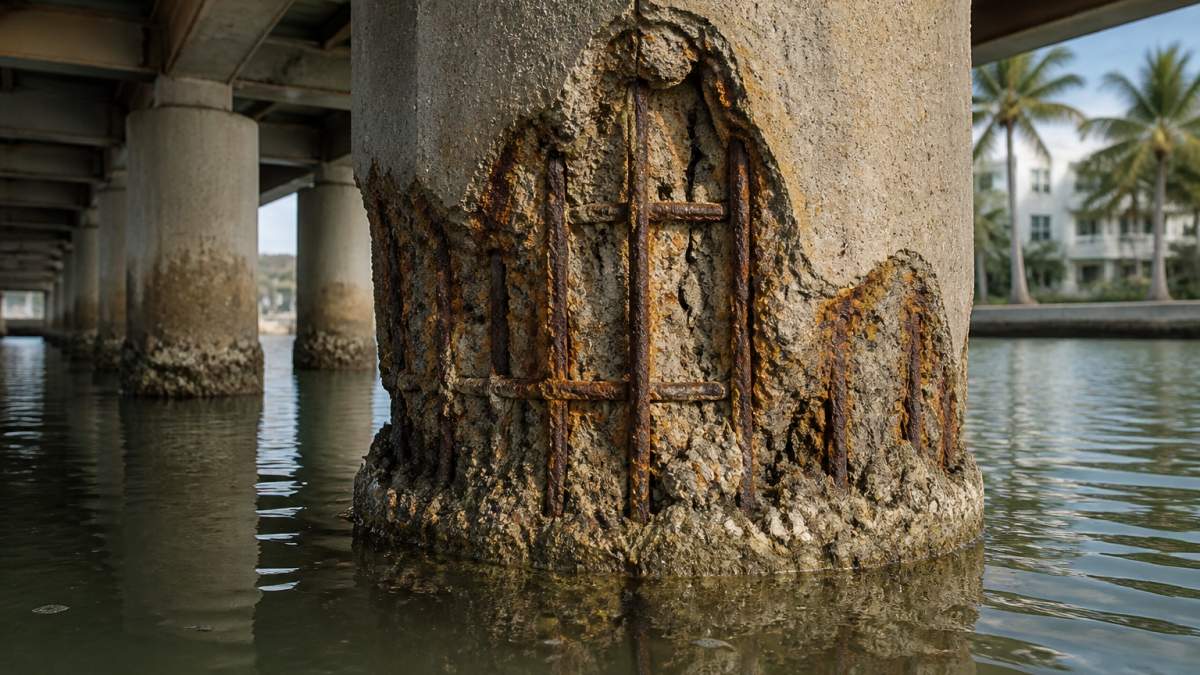
Once that layer breaks down, the steel loses cross-section and carries less load, while expanding rust pushes outward on the concrete.
Two conditions speed this up:
- Moisture intrusion that keeps chlorides moving through the concrete
- Cracks that give salt and water a direct path to the steel
What Saltwater Damage to Concrete Foundations Looks Like
Saltwater damage to concrete foundations shows up in a predictable order, learn it and you can act before damage gets expensive.
- Rust staining: Orange or brown streaks on the concrete surface
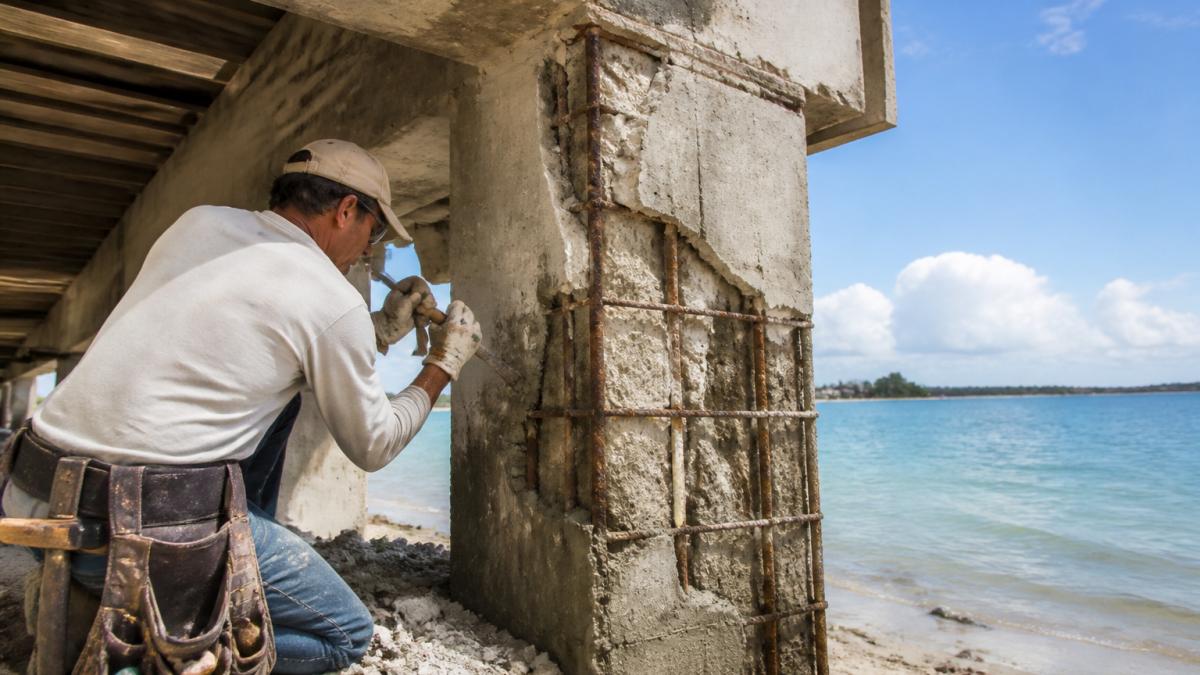
- Spalling: Flakes or chunks of concrete breaking off
- Salt deposits: White, chalky film on or near the foundation
Surface staining is cosmetic; spalling and exposed rebar are structural. Repair costs jump sharply at that line.
Saltwater Corrosion Protection for Concrete: Coatings, Sealants, and Membranes
Saltwater corrosion protection for concrete works by blocking chlorides from reaching the steel. The details decide whether a system lasts three years or thirty.
There are three main system types, and they are not interchangeable:
| System | What It Does | Best For | Typical Service Life | Maintenance |
|---|---|---|---|---|
| Epoxy coating | Seals the concrete surface against chlorides | Above-grade walls, splash zones | 5-10 years | Recoat when worn |
| Sealant (polyurethane or silicone) | Fills cracks and joints to stop water entry | Crack repair, control joints | 5-10 years | Inspect annually, replace as needed |
| Waterproof membrane (sheet or fluid-applied) | Full barrier against water and salt | Below-grade foundation walls | 20+ years | Minimal if installed correctly |
How to Choose a System
- Above-grade, salt air and wind-driven spray: A breathable elastomeric or epoxy coating is usually enough. A fully impermeable film can trap moisture.
- Splash zone (the lower few feet where spray hits and dries): The highest-stress band on the wall. Use a coating rated for immersion or frequent wetting, not standard exterior paint.
- Below-grade: You need a true waterproof membrane, not a coating. Below-grade walls face constant moisture and chloride-laden groundwater, and a coating won't hold back hydrostatic pressure.
What Actually Makes These Systems Fail
Coatings and membranes fail most often from poor surface preparation. A coating applied over salt deposits, dirt, or loose concrete will peel, and chlorides get in anyway.
Other common failure modes:
- Applying over a damp surface. Trapped moisture pushes the film off from behind.
- Mismatched products. A sealant that doesn't bond to the coating, or a coating that won't adhere to a membrane, creates a seam water finds.
- Skipping crack repair. Coating over an active crack hides it; the crack keeps moving and tears the film.
Surface Preparation: The Step That Decides Everything
Before any coating or membrane goes on:
- Wash the surface. Fresh water rinse to remove salt deposits, then let it dry fully.
- Remove loose material. Chip or grind away spalling, flaking concrete, and unsound substrate.
- Repair cracks and spalls first. Use a repair mortar compatible with the coating system.
- Check moisture. Most coatings require a dry substrate; a plastic-sheet test taped to the wall overnight shows whether moisture is still migrating.
- Prime if the product calls for it. Skipping primer shortens life.
Compatibility and Installation Notes
- Confirm the coating, sealant, and repair mortar are compatible, or verify adhesion between brands before full application.
- Follow the manufacturer's recoat window: too soon and the solvent traps; too late and the next coat won't bond.
- For below-grade membranes, protect the membrane during backfill with a drainage board against punctures from rock and compacted soil.
American Concrete Institute guidance on protective coatings and chloride-induced corrosion
Foundation Waterproofing for Coastal Homes: Below-Grade and Above-Grade Systems
Foundation waterproofing for coastal homes handles two directions of attack: salt from the air above and salt from the soil and water table below.
Above-grade, salt air and wind-driven spray are handled by a quality epoxy coating or elastomeric sealer.
A below-grade system usually combines:
- A waterproof membrane against the foundation wall
- A drainage layer to move water away
- Proper backfill that sheds water rather than holding it
Skip any one of those, and the system underperforms. We've seen plenty of coastal homes where the membrane was fine but the drainage was wrong, and the wall still stayed wet.
Drainage, Water Table, and Hydrostatic Pressure Control
Drainage is the part most homeowners overlook, and it decides whether everything else works. A perfect membrane on a wall with bad drainage still sits in wet, chloride-rich soil.
What Hydrostatic Pressure Actually Does
Water pooling against a foundation creates hydrostatic pressure, the force of standing water pushing against the wall. Pressure increases with depth, so the base carries the most load, which is why the worst damage shows up low on the wall near the footing.
A high water table makes this worse: when it rises above the footing, the soil stays saturated and the wall is under constant pressure rather than intermittent storm pressure.
Why Coastal Groundwater Is Different
In coastal areas, groundwater itself often carries chlorides:
- Fresh-water wetting drives carbonation and freeze-thaw damage.
- Chloride-laden wetting drives rebar corrosion directly; every cycle delivers chloride ions to the steel.
- Tidal and storm-surge flooding raises the water table quickly, then leaves salt in the soil as it recedes, feeding the next wetting cycle.
This is why drainage on a coastal foundation isn't just about keeping the basement dry. It's about cutting off the chloride supply.
Signs Your Drainage Is Failing
- Standing water or pooling near the foundation after rain
- Damp or discolored interior walls
- A musty smell in a basement or lower level
The Drainage System, in Order
The fix is rarely one thing. It's a system, and the order matters:
- Grade the soil so it slopes away from the foundation. About 6 inches over the first 10 feet is a common target, the cheapest fix and the one most often skipped.
- Clear gutters and extend downspouts well past the wall. Discharge should land at least 5-10 feet from the foundation, further on sloped lots.
- Install or repair footing drains. A perforated pipe at footing level, surrounded by washed gravel and wrapped in filter fabric, collects water before it builds pressure against the wall.
- Add a drainage layer against the wall. A dimpled drainage board or gravel layer gives water a path to the footing drain instead of sitting against the membrane.
- Use proper backfill. Free-draining granular backfill sheds water; heavy clay holds it against the wall and causes chronic dampness.
- Discharge to daylight or a sump. A footing drain with nowhere to go becomes a reservoir. Confirm the outlet is below the drain and clear of the foundation.
Skip any one of those, and the system underperforms. We've seen plenty of coastal homes where the membrane was fine but the drainage was wrong, and the wall still stayed wet.
Wave Action, Erosion, and Scour at the Foundation Toe
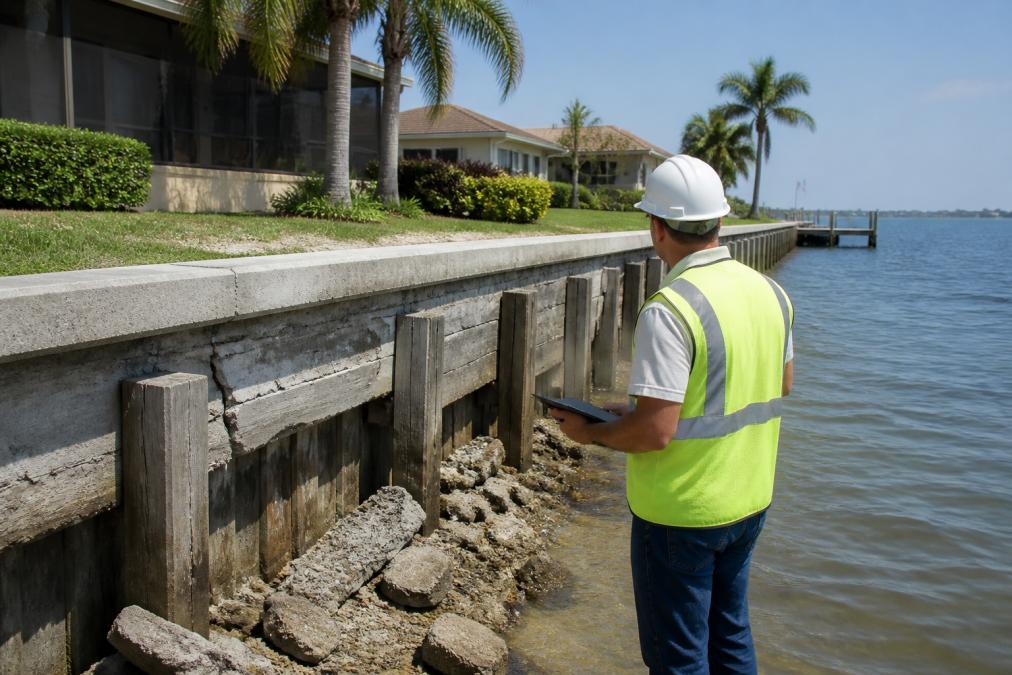
For properties at the water's edge, wave energy and erosion add risk. Shoreline protection like riprap or a properly built seawall protects the foundation toe from scour, the washing away of soil at the base.
Ready to move from scope to build? →
Scour removes the soil supporting the footing; once the toe is undermined, the wall loses bearing and moves. Watch for:
- A gap or void opening between the soil and the footing
- Exposed footing concrete that was previously buried
- Riprap that has shifted, settled, or washed out
Maintain riprap and shoreline structures on the same schedule as your foundation inspection, a small post-storm repair is far cheaper than rebuilding an undermined footing.
Coastal Foundation Inspection Checklist: Warning Signs You Can Measure
A coastal foundation inspection checklist turns guesswork into measurable signals. Walk your property twice a year, and after every major storm.
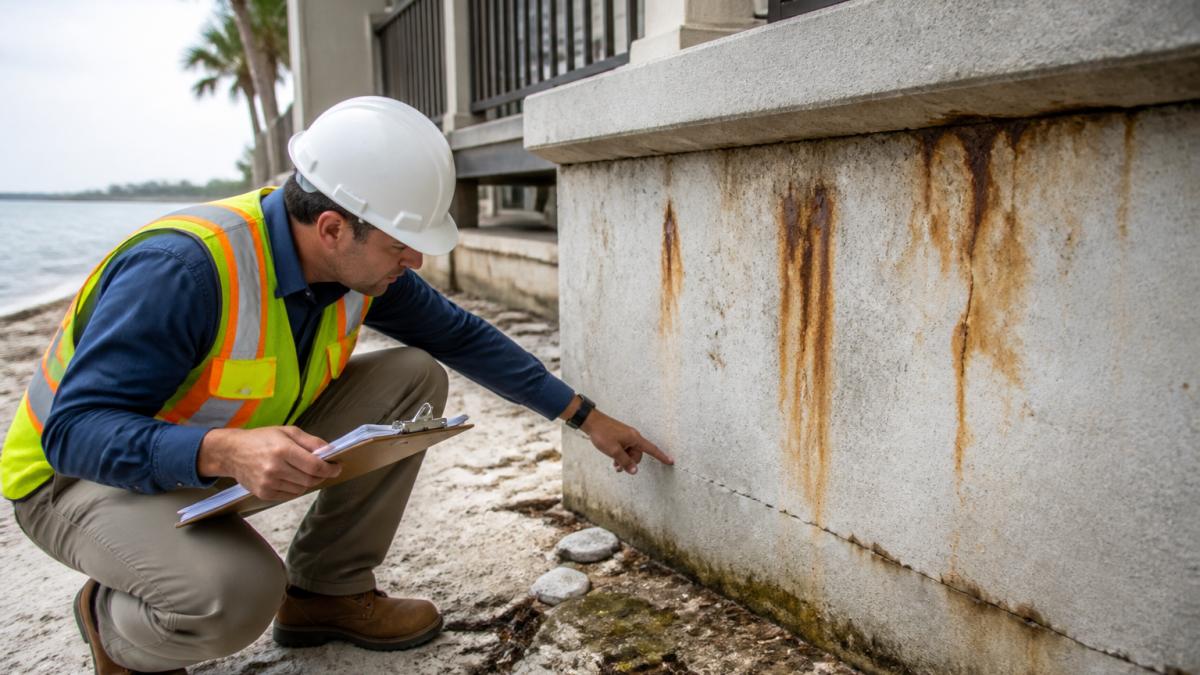
Use this list:
- Check for rust staining on foundation walls and around cracks
- Look for spalling, flaking, or crumbling concrete
- Measure crack widths and note any that have grown since your last check
Track findings with dates. A crack that measures the same every year is stable; a widening crack is a problem, and the rate of change tells you how urgent.
When to Call a Structural Engineer
Call a structural engineer when you find exposed rebar, active spalling, or widening cracks. Those aren't cosmetic and don't reverse on their own.
Other triggers:
- A crack wider than a credit card
- Any bowing or leaning in a foundation wall
- Rust staining that returns after cleaning
An engineer can assess the actual loss of capacity and give you a stamped repair plan, documentation that also matters for permitting, where projects stall without it.
Repair vs. Prevention: Making the Call Before Damage Spreads
The repair-versus-prevention decision comes down to one question: has the steel started to corrode? If yes, you're in repair territory.
Prevention is almost always cheaper. Coatings, sealants, drainage work, and regular rinsing keep chlorides out and cost a fraction of structural repair.
Repair means removing and replacing spalled concrete, treating or replacing corroded rebar, restoring the protective layer, and fixing whatever let the chlorides in.
Here's the decision framework we use:
| Condition | Action | Urgency |
|---|---|---|
| Surface staining only | Clean, coat, monitor | Routine |
| Hairline cracks, stable | Seal and re-inspect in 6 months | Near-term |
| Cracks widening | Engineer assessment | Prompt |
| Spalling or exposed rebar | Structural repair | Immediate |
The most common mistake is treating a structural problem as cosmetic.
Your Step-by-Step Plan for Preventing Saltwater Corrosion in Foundations
Step 1: Inspect twice a year. Use the checklist above.
Step 2: Rinse your foundation. Fresh water washes salt deposits off concrete.
Step 3: Fix drainage first. Grade, gutters, downspouts, footing drains.
Step 5: Seal cracks as they appear. Small cracks are cheap to seal.
Step 6: Inspect coatings annually. Recoat when you see wear.
Step 8: Keep records. Dates, photos, crack measurements.
Conclusion
Salt air, a high water table, and wave energy work against every coastal foundation, but the damage follows a predictable path that can be interrupted at any stage.
Take Off Construction Management brings two engineers on staff and a single point of accountability to coastal resilience work.
Ready to move from scope to build? Contact our team for an engineering-led assessment of your coastal foundation, with clear budget planning and financing options from the start.
Frequently Asked Questions
How can you prevent saltwater corrosion in a concrete foundation?
Preventing saltwater corrosion in foundations comes down to blocking chloride ions from reaching the reinforcing steel. That means applying a waterproof membrane or epoxy coating to below-grade concrete, sealing cracks as soon as they appear, and keeping drainage systems clear so standing water never pools against the foundation. Rinsing salt deposits off exposed concrete after storms and scheduling a professional inspection every 12 to 18 months rounds out the plan. Each layer matters because chloride ions travel through moisture, not air.
Does saltwater corrode reinforcing steel in concrete?
Yes. Chloride ions from saltwater penetrate the concrete's pore structure and break down the passive oxide layer that normally protects reinforcing steel. Once that layer is compromised, rebar corrosion begins, and the expanding rust creates internal pressure that cracks and spalls the concrete from the inside out. This is why rust staining on a foundation surface usually means corrosion is already well underway beneath it, and why early waterproofing matters more than surface patching.
What are the signs of saltwater damage to a foundation?
The most measurable signs include rust-colored staining on concrete surfaces, white salt deposits along the foundation toe, hairline cracks that widen over time, and spalling, which is when the concrete surface flakes or crumbles away. You may also notice a chalky or powdery texture on the concrete, or see exposed rebar in severe cases. Any of these warrant a professional coastal foundation inspection, because surface symptoms often indicate deeper rebar corrosion that is not visible.
How often should a coastal foundation be inspected?
A coastal foundation should be inspected by a qualified professional every 12 to 18 months, and after any major storm or flooding event. Homeowners can do a visual walkthrough quarterly, checking for new cracks, rust staining, or salt deposits. A structural engineer should evaluate the foundation if you find cracks wider than a credit card, visible rebar, or evidence of ongoing moisture intrusion. Catching corrosion early keeps repair costs significantly lower than addressing structural damage after it has spread.